How to Sync a Garage Door Remote in Fresno: A Step by Step Guide
Learning how to sync a garage door remote takes about two minutes once you know where the learn button is, and most Fresno homeowners who call for help are one press away from solving it themselves. The exception is worth knowing about too, because a remote that refuses to pair after several attempts is usually pointing at something other than the remote, which is when garage door opener repair becomes the faster path than another round of troubleshooting.
This guide covers the pairing process for the major opener brands, keypads and in-car buttons, and the specific reasons a sync fails.
SHORT ANSWER
Find the learn button on the back or side of the motor unit, usually under the light cover. Press and release it once. Within about thirty seconds, press and hold the button on your remote until the opener lights blink or the unit clicks. That confirms pairing. If nothing happens, replace the remote battery first, then confirm the remote is compatible with your opener’s frequency and code system.
Before You Start: Identify Your Opener
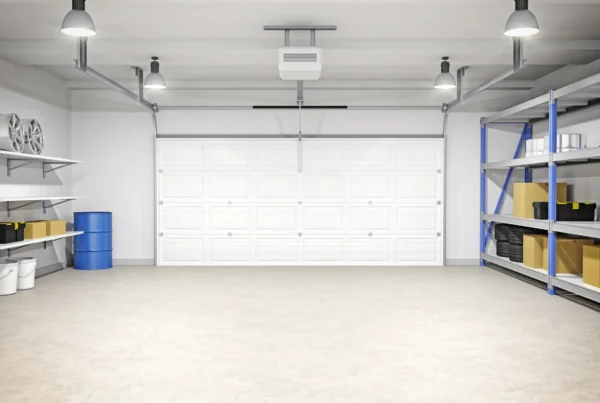
Everything depends on what is mounted to your ceiling. Find the motor unit, place a stable ladder under it, and look for the manufacturer label. You need two pieces of information: the brand and roughly how old the unit is.
The learn button is generally on the back or side panel of the motor head, often behind or beneath the light lens cover. On many models it sits next to a small LED. Its color matters on some brands, because the color indicates which code system the opener uses, and that determines which replacement remotes will work with it.
A remote has to match both the frequency and the code format of the opener. This is the most common reason a brand new remote from an online listing never pairs. It is not defective, it simply speaks a different language than the motor.
How to Sync a Garage Door Remote Step by Step
The general sequence is the same across brands. Press the learn button, then press the remote within the timeout window.
Chamberlain, LiftMaster, and Craftsman
- Locate the learn button on the motor unit, typically beside the antenna wire.
- Press and release it once. Do not hold it. A holding press erases programming rather than adding a remote.
- The LED beside the button illuminates, opening a window of roughly thirty seconds.
- Press and hold the button on your remote for a couple of seconds.
- The opener lights flash or the motor clicks, confirming the pairing.
- Test the remote from inside the garage before closing up.
Genie and Overhead Door
The process is nearly identical, though the button may be labeled program, set, or learn code rather than simply learn. On several Genie models the remote button must be pressed twice rather than once, with a pause between presses, and the LED changes state to confirm each step.
Because labeling and sequence vary by model year, check the sticker on the motor unit or the manual for your specific model before assuming the generic steps apply. More opener guidance is collected in the tips and guides section.
Erasing Every Remote
If a remote has been lost or stolen, or you have just bought the house, clear the opener’s memory rather than simply adding a new remote. Press and hold the learn button until the LED turns off, generally around six seconds. That erases every paired device, including keypads and car buttons, so plan to reprogram all of them afterward.
Programming a Wireless Keypad
Keypads follow a different sequence because they involve a PIN. In most cases you enter your chosen code on the keypad, press enter or the program button, then press the learn button on the motor unit, then press enter once more. Some models reverse the order and want the learn button pressed first.
Keypads mounted outside take real abuse in Fresno. Direct afternoon sun degrades the rubber buttons and shortens battery life, and a keypad that has become intermittent is often a hardware problem rather than a programming problem.
Syncing a Car’s Built-In Buttons
Vehicles with built-in garage buttons add a step. You typically train the car to your existing remote first, holding the remote a few inches from the car’s buttons until the indicator changes, and then press the learn button on the opener and the car button again to complete the pairing.
Newer openers using the current rolling code standard sometimes will not pair with an older vehicle system directly, and a small adapter is needed to bridge them. If your car buttons worked with a previous opener but will not train to a newly installed one, that mismatch is usually the reason.
When the Remote Will Not Sync
Work through these in order before assuming the opener has failed.
- Battery. By a wide margin the most common cause. Fresno summer heat sitting in a parked car shortens remote battery life considerably, so replace it before troubleshooting anything else.
- Timeout expired. The window after pressing learn is short. If you climbed down the ladder first, you likely missed it.
- Held the learn button. Holding erases instead of adding. Press and release, then start over.
- Incompatible remote. Frequency and code system must both match the opener.
- Range or interference. Try pairing while standing close to the unit. Certain LED bulbs installed in opener sockets emit interference that shortens remote range noticeably.
- Damaged antenna. The short wire hanging from the motor unit is the antenna. It should hang freely and be intact.
- Full memory. Older openers hold a limited number of devices. Clearing the memory and reprogramming resolves it.
If the door responds to the wall button but no remote will pair after all of that, the receiver board in the opener is the likely fault, and that is a repair rather than a programming issue. A technician handling garage door troubleshooting can confirm whether the board or the logic module needs replacing.
Older Openers, Safety, and Why Age Matters
Openers manufactured before the early 1990s use dip switches rather than a learn button. Pairing means matching a physical row of small switches inside the remote to the ones in the motor unit. It works, but it is worth knowing what else that age indicates.
Federal safety requirements adopted in 1993 mandated external entrapment protection, meaning the photo eye sensors mounted near the floor on each side of the door. An opener old enough to use dip switches predates that requirement and may lack those sensors entirely. It also uses a fixed code that never changes, which is far less secure than the rolling codes used since. For a unit that old, garage door opener installation addresses safety, security, and reliability at the same time rather than keeping an obsolete system running.
Test the Safety Reverse Before You Finish
While you are on the ladder, confirm the door reverses correctly. Place a solid object such as a block of wood flat on the floor in the door’s path and close the door. It should contact the object and immediately reverse. Then close the door and wave an object through the photo eye beam near the floor. The door should stop and reverse.
If either test fails, stop using the door and arrange garage door repair. A door that does not reverse is a genuine hazard, particularly in a household with children or pets.
Key Takeaways
- Press and release the learn button, then press the remote within roughly thirty seconds.
- Holding the learn button erases all programming instead of adding a remote.
- A dead battery causes most failed syncs, and Fresno heat shortens battery life.
- Replacement remotes must match both the frequency and the code system of the opener.
- Clear the opener’s memory when a remote is lost or when moving into a new home.
- Openers using dip switches predate 1993 safety requirements and are worth replacing.
- Test the safety reverse and photo eyes after any programming work.
Frequently Asked Questions
Where is the learn button on my garage door opener?
On the back or side of the motor unit mounted to the ceiling, frequently under the light cover next to a small LED and the antenna wire. You will need a ladder to reach it safely.
Why does my remote work sometimes but not from the driveway?
That pattern points to range rather than programming. Start with a fresh battery. If the problem continues, check that the antenna wire hangs freely and consider whether LED bulbs in the opener are causing interference, since some models emit signal noise that cuts remote range.
Can I use a universal remote?
Often yes, provided it lists your opener’s brand, frequency, and code system as compatible. Verify compatibility before buying rather than after, since an incompatible remote will never pair no matter how many times you repeat the steps.
I bought a house in Fresno. Should I reprogram the opener?
Yes. Clear the memory completely so any remotes still held by previous owners, contractors, or neighbors stop working, then program your own remotes and keypad code.
My remote worked yesterday and now nothing responds at all.
Check whether the wall button still operates the door. If the wall button works and no remote does, the opener’s receiver is the likely fault. If nothing works at all, check the power supply and breaker first.
How many remotes can one opener hold?
It varies by model, with older units holding fewer devices than current ones. If a new remote refuses to pair while existing ones still work, a full memory may be the reason, and clearing and reprogramming everything resolves it.
Conclusion
Knowing how to sync a garage door remote saves a service call in most cases. Press and release the learn button, pair the remote within the timeout, and start with a fresh battery whenever something goes wrong. The cases that do not resolve that way, including a dead receiver, an opener too old to meet current safety standards, or a door that fails its reverse test, are the ones worth handing to a technician.
A Plus Garage Doors handles opener repair, reprogramming, installation, and full garage door service for homeowners throughout Fresno and the surrounding communities. If your remote will not pair, your opener has stopped responding, or your door is not reversing the way it should, reach out today to request service.